 by
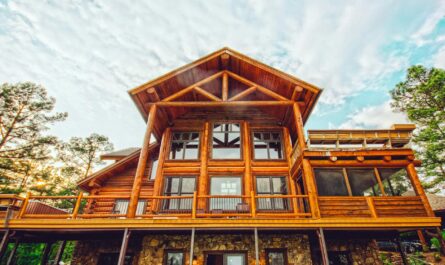
by Restoring a log cabin is a labor of love that breathes new life into a structure rich with history and rustic charm. Whether your cabin has weathered decades of use or needs a refresh, following a step-by-step restoration guide will help you preserve its beauty and integrity for generations to come. This comprehensive guide walks you through every phase of the process, from assessing the condition of your logs and repairing damage to sealing, staining, and maintaining both the exterior and interior. With careful attention and a systematic approach, you can restore your log cabin to its former glory, ensuring it remains a cherished retreat for years.
Table of Contents
Assessing the Condition of Your Log Cabin
The first and most critical step in the restoration process is to thoroughly assess the condition of your log cabin. Restoring a log cabin requires a clear understanding of its structural health and the specific areas that need attention. A comprehensive inspection will help you identify the extent of repairs needed, whether minor cosmetic fixes or more extensive structural work.
Checklist for Assessing the Cabin
- Structural Integrity: Begin by walking around the exterior and interior of your cabin to evaluate its overall stability. Look for any signs of shifting, sagging, or settling in the structure. Pay close attention to the foundation, walls, and roofline. Are there any visible gaps, warping, or signs of imbalance? These could indicate deeper structural issues that need immediate attention.
- Insect and Pest Damage: Inspect the logs for any evidence of insect infestations, such as termites, carpenter ants, or wood-boring beetles. Holes, sawdust-like material, or weakened wood are common indicators of pest damage. If the infestation is severe, you may need professional assistance.
- Rot and Decay: One of the most common problems in older log cabins is wood rot, particularly in areas exposed to constant moisture. Check the lower logs close to the ground, window and door frames, and roof eaves for soft, spongy wood or visible decay. Poking the logs with a screwdriver can help you assess the extent of rot. If the wood crumbles easily, it likely needs to be replaced.
- Moisture and Water Damage: Water is the enemy of wood. Look for any signs of water damage, such as discoloration, mildew, mold, or moisture stains on the logs or inside the cabin. Ensure that gutters and downspouts are properly diverting water away from the cabin, and check for leaks in the roof and around windows and doors.
- Cracks and Splits: Logs can develop cracks called “checks.” While some checking is routine and part of the natural aging process of wood, larger cracks, especially those that allow water penetration, should be addressed. Note any cracks’ size, depth, and location to determine whether they need sealing or further repair.
By carefully assessing these elements, you can form a clear picture of the cabin’s condition. This assessment will guide the scope of your restoration work, helping you focus on the areas that need it most and ensuring that your log cabin restoration project starts on solid ground.
Video: Log Home Inspection (What to Look for BEFORE You Buy)
Planning Your Log Cabin Restoration Project
Once you’ve completed your initial assessment, the next step in restoring a log cabin is planning the restoration project. This phase is crucial, as it sets the foundation for the success of your efforts. Proper planning ensures the restoration will be completed efficiently, within budget, and with lasting results.
Establishing a Timeline and Budget
Log cabin restoration can be time-consuming and costly, depending on the extent of damage and the work required. To avoid delays and overspending, it’s essential to establish a realistic timeline and budget before you begin.
- Timeline: Consider how long each phase of the restoration will take. For example, cleaning and prepping the logs might only take a weekend, while more extensive repairs or replacing damaged logs could stretch over weeks or even months. Make sure to factor in weather conditions, especially if you’re working in a climate with heavy rains or snowfall, as this can delay your project.
- Budget: Estimate the cost of materials, tools, and labor (if you plan to hire professionals). Remember that unexpected issues, such as discovering more extensive damage than initially thought, can add to the costs. Build a buffer of 10-20% over your initial estimate to cover any surprises. Remember to budget for regular maintenance after restoration to protect your investment.
DIY vs. Hiring Professionals
After assessing the condition of your log cabin, you’ll need to decide whether to tackle the restoration yourself or hire professionals. This decision should be based on the extent of the repairs needed and your skill level.
- DIY Restoration: If the damage is minor—such as cleaning, sealing, or replacing a few logs—you may be able to handle the restoration yourself. DIY can save you money and give you a hands-on experience in preserving your cabin. However, having the right tools and a solid understanding of what the job entails is important. Basic DIY restoration tasks include pressure washing, staining, and sealing.
- Hiring Professionals: For more significant issues such as structural repairs, foundation work, or dealing with extensive rot or insect damage, it’s often best to bring in experienced professionals. Restoration specialists have the expertise, equipment, and techniques to properly restore your log cabin and ensure it lasts for years to come. They can also help with more complex tasks such as log replacement, chinking, and re-roofing.
Gathering Materials and Tools
Once you’ve determined whether to go DIY or hire help, start gathering the materials and tools you’ll need for the restoration. Some of the basic materials you’ll require include:
- Caulk and Sealant: Essential for sealing gaps, cracks, and joints between logs to prevent moisture and air infiltration.
- Stain or Finish: Protects the logs from UV damage, moisture, and pests while enhancing the cabin’s natural beauty.
- Log Replacement Materials: If some of your logs are beyond repair, you’ll need to source suitable replacements. This might include full logs, half logs, or log siding, depending on the extent of the damage.
- Wood Preservatives: Products to treat logs for insect and rot resistance, especially for logs close to the ground or in areas prone to moisture.
- Chinking or Mortar: Used to seal the spaces between logs and prevent drafts, water intrusion, and pests.
Understanding Permit Requirements
Restoring a log cabin may require permits depending on your location and the scope of the work. This is especially true if you are making structural changes, replacing large sections of the cabin, or altering the exterior in any significant way.
- Local Zoning Laws: Contact your local government or zoning office to find out if you need permits for restoration work. Some areas have specific regulations regarding historical buildings, so if your log cabin is an older structure, additional approvals may be required.
- Historical Preservation Guidelines: If your cabin is considered a historic property, you may need to adhere to specific restoration guidelines to maintain its historical integrity. Consult with local preservation societies or authorities to ensure compliance.
Video: Frequently Asked Questions About Log Home Restorations
Properly planning your log cabin restoration project will help you avoid costly mistakes, ensure you have the necessary resources, and allow you to anticipate any legal requirements or challenges you may face. With a solid plan in place, you can move forward with confidence, knowing your restoration efforts will be successful and your log cabin will stand the test of time.
Cleaning and Prepping the Logs of Your Cabin
With your plan in place, the next step in restoring a log cabin is cleaning and prepping the logs. Properly preparing the logs is crucial to ensuring that the restoration materials, such as sealants and stains, adhere correctly and provide long-lasting protection. This phase involves removing years of dirt, grime, mildew, and any old finishes that may be compromising the logs.
Step 1: Pressure Washing the Logs
The first step in the cleaning process is to thoroughly wash the exterior of the cabin. Pressure washing is one of the most effective methods for cleaning logs, as it removes dirt, mildew, and any loose debris. However, care must be taken to avoid damaging the wood.
- Choosing the Right Pressure Washer: Opt for a pressure washer with an adjustable nozzle that allows you to control the water pressure. A pressure setting between 500 to 1,500 psi is usually recommended for logs. Too much pressure can gouge the wood and cause long-term damage.
- Proper Technique: Hold the pressure washer at a 30-degree angle and keep the nozzle moving to avoid concentrated blasts of water on a single spot. Work in small sections, moving along the grain of the logs, and avoid spraying directly into any cracks or joints. Allow the logs to dry completely after pressure washing, which may take a few days depending on the weather conditions.
Step 2: Scrubbing and Sanding
After pressure washing, some areas may still have stubborn stains, mildew, or remnants of old finishes that require manual scrubbing or sanding. This is a critical step in restoring a log cabin because the surface must be as clean and smooth as possible before applying any treatment.
- Scrubbing the Logs: Use a stiff bristle brush and an eco-friendly, non-toxic cleaning solution to scrub any remaining grime or mildew from the logs. Avoid using bleach-based cleaners, as they can weaken the wood fibers and leave a residue that prevents stains and sealants from adhering properly. For mold or algae, opt for specialized log cleaners that are safe for wood.
- Sanding: After cleaning, inspect the logs for any rough patches, remaining paint or old finish, or splintered wood. Light sanding will help remove these imperfections and create a smooth surface for sealing and staining. Use a medium-grit sandpaper (80 to 100 grit) and work in the direction of the wood grain. Sanding also helps open up the wood pores, making them more receptive to stains and preservatives.
Step 3: Protecting Surrounding Areas
Before you start applying treatments to the logs, it’s important to protect the surrounding areas of your cabin to prevent any accidental damage. Windows, doors, foundations, and landscaping should be shielded from cleaning agents, sealants, or stains that might cause damage or unsightly stains.
- Covering Windows and Doors: Use plastic sheeting or painter’s tape to cover windows and doors, ensuring that no overspray from cleaning products or stains comes into contact with the glass or frames.
- Protecting the Foundation: If your cabin sits on a stone or concrete foundation, cover it with plastic sheeting or drop cloths. This prevents the foundation from absorbing any cleaning solutions or stains, which can discolor the stone or concrete.
- Shielding Landscaping: Plants, shrubs, and trees surrounding your cabin should also be covered or moved temporarily. Some cleaners and stains can be harmful to plants, so keeping them protected will avoid any damage.
Step 4: Choosing Eco-Friendly Cleaners
When cleaning and prepping the logs, it’s essential to choose cleaners that are safe for the environment and the wood itself. Traditional harsh chemicals like chlorine bleach can damage the logs over time, leach into the soil, and harm surrounding vegetation.
- Eco-Friendly Solutions: Many companies now offer environmentally safe log cleaning solutions that are biodegradable and free from harmful chemicals. Look for cleaners specifically formulated for log cabins, which are effective at removing mildew, mold, and dirt without compromising the wood’s integrity.
- Vinegar and Baking Soda: For smaller cabins or minor cleaning tasks, a mixture of vinegar and water or a baking soda solution can be a great alternative. These natural solutions are less abrasive than commercial products and are safe for both the logs and the surrounding environment.
Step 5: Letting the Logs Dry Completely
After the logs have been cleaned and prepped, it is crucial to let them dry completely before moving on to the next step of restoration. Depending on the climate and weather, this could take anywhere from a few days to a week.
- Checking for Moisture: Use a moisture meter to ensure the logs have reached an appropriate level of dryness. Logs should have a moisture content of 15% or less before applying any sealants or stains. Sealing damp logs can trap moisture inside, leading to rot or mildew growth.
Video: Cleaning Your Logs Prior to Log Home Stains
Proper cleaning and prepping of your log cabin’s logs is the foundation for the rest of the restoration process. By taking the time to do this step correctly, you’ll ensure that your logs are ready to accept treatments that will protect them for years to come. With the right tools, techniques, and patience, you’ll be well on your way to successfully restoring your log cabin to its former glory.
Repairing or Replacing Damaged Logs in Your Log Cabin Home

Once your log cabin is thoroughly cleaned and prepped, it’s time to address any damaged or rotting logs. Repairing or replacing logs is a crucial step in the restoration process, as neglecting damaged areas can lead to structural instability and further deterioration over time. Depending on the extent of the damage, you may be able to repair the logs or, in more severe cases, replace them entirely.
Step 1: Inspecting the Logs for Damage
Before you begin repairs, take a close look at the logs to assess the extent of the damage. The most common issues you’ll encounter when restoring a log cabin are rot, insect damage, and deep cracks or “checks.”
- Rotting Logs: Wood rot typically occurs when logs are exposed to excessive moisture for prolonged periods. Rot can range from surface-level decay to deep, structural damage. Logs that feel soft, spongy, or crumble under pressure should be replaced, as their structural integrity has been compromised.
- Insect Damage: Look for signs of termites, carpenter ants, or other wood-boring insects. Small holes, tunnels, and sawdust-like debris are telltale signs. If the infestation is minor, it may be possible to treat the wood with insecticides and repair the damage. In more severe cases, replacing the affected logs is often the best solution.
- Cracks and Checks: Cracks, or “checks,” are common in logs as they naturally expand and contract with changes in temperature and humidity. While some checking is normal and not structurally significant, larger cracks that penetrate deeply into the wood can lead to water infiltration and further damage. These should be filled or sealed.
Step 2: Repairing Logs with Epoxy or Wood Fillers
For minor to moderate damage, such as surface-level rot or shallow cracks, repairing the logs using epoxy or wood fillers is a cost-effective and efficient solution. This method allows you to preserve the original logs while reinforcing their strength.
- Using Epoxy: Epoxy is a durable, long-lasting material that can be used to fill in areas of rot, insect damage, or cracks. Start by removing any loose or crumbling wood from the damaged area. Once the area is clean and dry, apply the epoxy filler according to the manufacturer’s instructions. Mold the epoxy to match the surrounding wood, and allow it to cure fully. Once hardened, the epoxy can be sanded, stained, and sealed to blend in with the rest of the log.
- Wood Fillers: Similar to epoxy, wood fillers can be used to fill smaller cracks and gaps in the logs. Wood fillers are typically easier to work with for minor repairs but may not be as durable as epoxy for larger areas of damage. After applying the filler, sand it down to ensure a smooth, even surface that’s ready for staining and sealing.
Step 3: Replacing Severely Damaged Logs
If the damage is too extensive to repair with fillers or epoxy, replacing the affected logs is often the best option. Replacing logs can be a more complex task, but it’s essential for preserving the cabin’s structural integrity and preventing further deterioration.
- Removing the Damaged Log: Begin by carefully removing the damaged log. Depending on the location of the log (e.g., foundation logs, roofline logs), this may require additional bracing to support the structure while the log is removed. Use a reciprocating saw or chainsaw to cut the log free from the surrounding structure, being careful not to damage adjacent logs or joints.
- Sourcing Replacement Logs: It’s important to find replacement logs that match the size, species, and profile of the original logs to maintain the cabin’s aesthetic and structural consistency. Many restoration specialists or sawmills can provide custom-cut replacement logs that are milled to match your existing cabin.
- Fitting the New Log: Once the damaged log is removed, carefully measure and fit the replacement log into place. Depending on the construction of your cabin, you may need to notch or shape the log to fit the existing structure. Ensure the replacement log fits snugly and provides adequate support.
- Securing the Replacement Log: Secure the replacement log with appropriate fasteners, such as log screws or spikes. Pay close attention to sealing the joints between the replacement log and the existing structure to prevent moisture infiltration. Once in place, the new log can be sanded, stained, and sealed to match the surrounding logs.
Step 4: Chinking and Sealing the Gaps
Once the logs have been repaired or replaced, it’s essential to properly seal the gaps between the logs to prevent air drafts, water intrusion, and pests from entering the cabin. This process, called chinking, involves filling the spaces between the logs with a flexible, waterproof material.
- Applying Chinking: Modern chinking materials are made from a flexible, elastomeric compound that moves with the logs as they expand and contract with temperature changes. Apply the chinking using a caulking gun, and smooth it out with a trowel or your fingers to create a tight, even seal between the logs. Be sure to apply chinking to both the interior and exterior of the cabin for maximum protection.
- Caulking Small Gaps: For smaller cracks and joints, use a high-quality, weatherproof caulk to fill gaps. This is particularly important around windows, doors, and corners, where air leaks and water intrusion are more likely to occur.
Step 5: Ensuring Proper Insulation and Protection
When replacing logs or repairing large sections of the cabin, it’s important to ensure that the new materials are properly insulated and protected from the elements.
- Insulation: If you’ve replaced a log or large section of the wall, check the insulation behind the logs before sealing everything up. Proper insulation will help regulate the temperature inside the cabin and prevent drafts.
- Protection from Moisture: After repairs are complete, make sure the logs are adequately protected from moisture by applying a wood preservative and water repellent. This is especially important for logs close to the ground or in areas prone to frequent rain or snowfall.
Video: How to Replace Logs on Your Log Home
Repairing and replacing damaged logs is a crucial step in the log cabin restoration process. Whether you’re tackling minor repairs with epoxy or undertaking full log replacements, proper attention to detail and technique will ensure your cabin remains structurally sound and aesthetically pleasing for years to come.
Sealing and Staining the Logs on a Cabin
After repairing or replacing damaged logs, the next step in restoring a log cabin is to protect the wood from future damage by sealing and staining the logs. This process not only enhances the aesthetic appeal of your cabin but also provides essential protection against moisture, UV rays, and insects. Properly sealing and staining will extend the life of the logs and help preserve your cabin for years to come.
Step 1: Understanding the Importance of Sealing and Staining
Sealing and staining the logs serve two main purposes:
- Moisture Protection: Wood is highly susceptible to moisture, which can lead to rot, decay, and mold growth. Sealing the logs creates a barrier that prevents water from penetrating the wood, reducing the risk of these issues.
- UV Protection: UV rays from the sun can cause wood to fade, crack, and deteriorate over time. Stains typically contain UV inhibitors that protect the logs from the sun’s harmful effects, helping to maintain their color and integrity.
In addition, a good stain enhances the wood’s natural beauty by bringing out the grain and texture while also providing a layer of defense against insects and other environmental factors.
Step 2: Choosing the Right Sealant and Stain
Log home restoration building supplies start and end with stains and finished. Selecting the right sealant and stain for your log cabin ensures the best protection and finish. Here are some factors to consider:
- Oil-Based vs. Water-Based: Oil-based stains penetrate deeply into the wood and provide long-lasting protection, making them a popular choice for log cabins. They offer excellent water resistance but may take longer to dry and can emit strong odors. Water-based stains, on the other hand, are easier to clean up, dry faster, and have lower VOC emissions, but may not penetrate the wood as deeply.
- Clear vs. Tinted Stains: Clear sealants allow the natural color of the wood to shine through but offer minimal UV protection. Tinted or pigmented stains provide better UV protection and can enhance the wood’s appearance by adding rich, natural-looking color. Choose a tint that complements the aesthetic you want for your cabin while ensuring adequate protection.
- Climate Considerations: The climate in which your cabin is located plays a significant role in the type of sealant and stain you choose. For cabins in wet or humid areas, look for a sealant with strong water-repellent properties. In areas with intense sunlight, opt for a stain with high UV resistance.
Step 3: Preparing the Logs for Sealing and Staining
Before applying any sealant or stain, it’s essential that the logs are properly prepared. This involves ensuring that the logs are clean, dry, and free of any dust or debris.
- Cleaning the Logs: If it’s been a while since you cleaned the logs, consider doing a light wash with a hose or pressure washer (at a low setting) to remove any dirt that may have accumulated since the last cleaning. Allow the logs to dry completely before proceeding.
- Sanding Rough Areas: If there are any rough patches or areas that were repaired with epoxy or wood filler, sand them down to create a smooth, even surface. This will help the stain and sealant adhere evenly and provide a better finish.
- Moisture Check: Use a moisture meter to ensure that the logs have a moisture content of 15% or less. Sealing damp logs can trap moisture inside, leading to rot and decay.
Step 4: Applying the Sealant
Applying a high-quality sealant is the first step in protecting your logs from moisture. Here’s how to do it effectively:
- Application Method: Most sealants can be applied using a brush, roller, or sprayer. A sprayer can cover large areas quickly but may require back-brushing to ensure even coverage. If using a brush or roller, apply the sealant in long, even strokes, working in the direction of the grain to prevent streaking.
- Two to Three Coats: Apply two to three coats of sealant, allowing adequate drying time between each coat as specified by the manufacturer. Multiple coats provide added protection and durability.
- Focus on Vulnerable Areas: Pay special attention to vulnerable areas such as the base of the cabin, around windows and doors, and the tops of the logs where water can collect. These areas are more prone to moisture infiltration and require extra care during the sealing process.
Step 5: Staining the Logs
Once the sealant has dried, it’s time to apply the stain. Staining not only adds color and enhances the appearance of the wood but also provides additional protection against UV rays and insects.
- Applying the Stain: Similar to applying the sealant, use a brush, roller, or sprayer to apply the stain evenly across the logs. Work in small sections, starting at the top of the cabin and working your way down to prevent drips and runs. Make sure to saturate the wood and avoid leaving any bare spots.
- Multiple Coats: Depending on the product and the desired color intensity, you may need to apply two or more coats of stain. Follow the manufacturer’s instructions for drying times between coats.
- Blending and Touch-Ups: After the final coat of stain has dried, check for any uneven areas or spots that need touch-ups. Use a small brush to carefully blend the stain in these areas for a uniform finish.
Step 6: Maintenance and Reapplication
Sealing and staining are not one-time tasks; regular maintenance is required to keep your log cabin looking its best and protected from the elements.
- Routine Inspections: Inspect the logs every year for signs of wear, such as fading, peeling, or water damage. Pay close attention to areas that are more exposed to the sun or rain, as these are likely to need more frequent maintenance.
- Reapplication Schedule: Depending on the quality of the stain and sealant, you’ll need to reapply these products every three to five years. High-quality stains and sealants last longer, but factors such as climate and exposure to the elements will influence how often reapplication is necessary.
- Cleaning Between Applications: To extend the life of your stain and sealant, keep the exterior of your cabin clean by gently washing the logs every year. This prevents dirt and mildew from accumulating and wearing down the protective layers.
Video: How to Stain and Seal Your Log Home
Sealing and staining are crucial steps in the log cabin restoration process. By investing the time and effort to properly protect your logs, you ensure that your cabin will withstand the elements and remain a beautiful, functional retreat for years to come. Remember that regular maintenance is key to preserving the wood and preventing costly repairs down the line.
Log Cabin Roof and Foundation Restoration
Restoring the roof and foundation of your log cabin is just as critical as restoring the logs themselves. The roof and foundation are essential components of your cabin’s structure, protecting it from the elements and ensuring stability. A compromised roof or foundation can lead to water damage, rot, and structural failure, so it’s crucial to address any issues during your log cabin restoration.
Step 1: Assessing the Roof for Damage
The first step in roof restoration is assessing its condition. A thorough inspection will help you identify any areas that need repair or replacement.
- Signs of Roof Damage: Look for missing, cracked, or curling shingles, sagging sections, water stains on the ceiling inside the cabin, and visible leaks. Pay close attention to areas around chimneys, vents, and skylights, as these are common points for leaks.
- Material Considerations: The type of roofing material on your cabin will determine how you approach restoration. Asphalt shingles are common and relatively easy to replace, while metal roofs or wooden shakes may require specialized knowledge or professional help.
- Structural Issues: In addition to inspecting the roofing material, check for underlying structural issues such as rotting beams, damaged rafters, or inadequate ventilation, which could lead to moisture buildup and rot.
Step 2: Repairing or Replacing the Roof
Once the assessment is complete, you can determine whether the roof needs minor repairs or a full replacement.
- Minor Roof Repairs: If the damage is limited to a few shingles or small sections, you can likely repair these areas yourself. Replace any damaged or missing shingles, re-nail any loose flashing, and seal around chimneys, vents, and skylights with roofing caulk or sealant. Be sure to check for leaks and ensure proper drainage to prevent future problems.
- Full Roof Replacement: If the damage is widespread or the roof is old and nearing the end of its lifespan, replacing the entire roof may be the best option. Removing the old roofing material down to the decking is important to inspect for any rot or damage to the underlying structure. If you are replacing the roof, consider upgrading to more durable materials like metal roofing, which is long-lasting, weather-resistant, and requires less maintenance.
Step 3: Inspecting the Foundation for Damage
Just like the roof, the foundation is a critical component of your log cabin’s structural integrity. A compromised foundation can lead to settling, uneven floors, cracks in the walls, and water infiltration. Before any major restoration work on the logs begins, it’s essential to ensure the foundation is stable and secure.
- Signs of Foundation Issues: Common signs of foundation problems include visible cracks in the foundation walls, uneven or sloping floors, doors and windows that stick or don’t close properly, and gaps between the logs. Water pooling around the foundation after rain is also a red flag and should be addressed to prevent moisture from seeping into the wood.
- Types of Foundations: The type of foundation your cabin sits on (slab, pier and beam, or full basement) will dictate the kind of repairs needed. Cabins on pier and beam foundations are more susceptible to shifting, while slab foundations can develop cracks over time due to soil movement.
Step 4: Foundation Repair and Reinforcement
Depending on the extent of the damage, foundation repairs can range from simple fixes to more complex restoration efforts.
- Filling Cracks: Small cracks in the foundation can be filled with epoxy or hydraulic cement to prevent water from entering the cabin. It’s important to address even small cracks early, as they can expand and cause more significant problems if left untreated.
- Re-Leveling and Reinforcement: If your cabin has settled unevenly or if there are significant shifts in the foundation, re-leveling may be necessary. This often involves jacking up the cabin and reinforcing or replacing the support piers or beams underneath. For slab foundations, a process called slabjacking can be used to lift and level the foundation. In more severe cases, additional piers or concrete reinforcements may be needed to stabilize the structure.
- Waterproofing and Drainage: Moisture is a major threat to any foundation. If your cabin’s foundation is prone to water intrusion, consider installing a drainage system such as French drains to redirect water away from the foundation. Applying a waterproofing membrane or sealant to the foundation walls can also help prevent moisture from seeping into the structure.
Step 5: Maintaining the Roof and Foundation
Once the roof and foundation have been restored, regular maintenance is key to preventing future issues. Routine inspections and proactive measures can save you time and money in the long run.
- Roof Maintenance: Inspect the roof annually for signs of wear and damage, especially after severe weather events. Clear gutters and downspouts regularly to prevent water from backing up onto the roof and causing leaks. Replace any damaged shingles promptly, and keep an eye on flashing around chimneys and vents.
- Foundation Maintenance: Ensure proper drainage around the cabin by regularly checking and cleaning gutters and downspouts, and grading the landscape to direct water away from the foundation. Address any small cracks in the foundation as soon as they appear to prevent them from worsening over time.
- Preventing Moisture Buildup: Moisture is one of the biggest threats to the foundation and logs. Trim back trees and shrubs around the cabin to allow for proper airflow and sunlight exposure, which will help keep the foundation dry and free from mold and mildew.
Video: 16 Tips –Watch BEFORE House Foundation Repairs
Restoring the roof and foundation of your log cabin is essential for preserving the structure and ensuring its longevity. These components protect your cabin from the elements and provide the stability needed to maintain the integrity of the entire building. By taking the time to carefully assess, repair, and maintain your roof and foundation, you’ll safeguard your log cabin for future generations to enjoy.
Final Touches and Maintenance Tips for Log Cabins
Now that the major restoration tasks are complete—repairing the logs, sealing and staining, and addressing the roof and foundation—it’s time to focus on the final touches that will bring your log cabin back to its full glory. This section will cover those finishing details that enhance both the cabin’s aesthetics and functionality, as well as provide tips for long-term maintenance to preserve your hard work.
Step 1: Restoring Windows and Doors
Windows and doors are key features of your cabin’s exterior and interior, and restoring them adds both beauty and energy efficiency to your log cabin.
- Inspect for Damage: Start by inspecting all the windows and doors for any signs of damage, such as warped frames, rotted wood, broken glass, or worn-out seals. Damaged windows and doors not only detract from the cabin’s appearance but can also lead to drafts and moisture infiltration.
- Repairing or Replacing Frames: If the wood around the windows or doors is damaged, you may need to repair or replace the frames. For minor damage, wood fillers can be used to patch up cracks or small areas of rot. For more extensive damage, consider replacing the frames entirely with new wood or a weather-resistant material like vinyl or aluminum that matches the cabin’s rustic aesthetic.
- Refinishing Windows and Doors: Sand and refinish the wood on the window and door frames to match the rest of the cabin’s exterior. Apply a protective finish or sealant to ensure long-term durability. If you’re replacing older windows, consider upgrading to energy-efficient models that offer better insulation without compromising the cabin’s charm.
Step 2: Adding Interior Finishing Touches
Once the exterior restoration is complete, you can turn your attention to the inside of the cabin. Restoring interior elements can dramatically improve the cabin’s comfort and appearance.
- Restoring Interior Logs: If your cabin features exposed logs inside, follow the same cleaning and sealing process as you did for the exterior logs. Sand down any rough areas and apply a fresh coat of stain or sealant to protect the wood and maintain its rustic beauty.
- Upgrading Flooring: Cabin floors often take a beating from heavy foot traffic, especially in areas prone to dirt and moisture. If the flooring is worn, consider refinishing it or installing new, durable materials like hardwood, tile, or even stone that complement the cabin’s rustic aesthetic.
- Updating Fixtures and Hardware: Replace any outdated or worn hardware such as door handles, cabinet pulls, and light fixtures with new pieces that align with the log cabin’s style. Rustic or vintage-inspired hardware in bronze, iron, or wood can add character to your cabin’s interior.
Step 3: Maintaining Your Restored Log Cabin
Once your restoration is complete, maintaining your log cabin is crucial to preserve its beauty and structural integrity for years to come. Regular maintenance will help you catch potential problems early and extend the life of your restoration efforts.
- Annual Inspections: Conduct a thorough inspection of both the interior and exterior of the cabin at least once a year. Look for signs of wear and tear, such as cracks in the logs, water damage, pest infestations, or roof issues. Pay special attention to areas that are more exposed to the elements, such as the roof, foundation, and windows.
- Cleaning the Logs: Keep the exterior logs clean by washing them annually with a hose or low-pressure washer. This helps remove dirt, pollen, and mildew that can degrade the wood and its protective coatings over time. Be sure to reapply wood preservatives and UV protectants every few years to maintain the logs’ protection against moisture and sunlight.
- Chinking and Caulking: Check the chinking and caulking between the logs and around windows and doors regularly. Over time, these materials can crack or shrink, allowing drafts and moisture to enter the cabin. Reapply chinking and caulking as needed to ensure a tight, weatherproof seal.
- Pest Control: Protect your cabin from wood-boring insects like termites, carpenter ants, and beetles by applying insecticides or wood preservatives as part of your maintenance routine. Regularly check for signs of infestation and address any issues immediately to prevent extensive damage.
- Roof and Gutter Maintenance: Keep the roof and gutters clean and free of debris. Clogged gutters can lead to water overflow, which can damage the roof, foundation, and logs. Regularly inspect the roof for any missing or damaged shingles and replace them promptly to prevent leaks.
Step 4: Seasonal Maintenance Tips
In addition to annual inspections, seasonal maintenance tasks are vital for keeping your log cabin in top shape throughout the year.
- Spring: After winter, inspect for any damage caused by snow, ice, or moisture. Clean the logs and gutters and touch up any areas of the sealant that have worn down.
- Summer: Reapply stain or sealant if needed, especially if your cabin is exposed to intense sunlight. This is also a good time to address any minor repairs or touch-ups around the cabin.
- Fall: Prepare your cabin for the colder months by inspecting the roof and foundation, clearing gutters, and sealing any gaps or cracks that could let in cold air or moisture.
- Winter: Keep snow from piling up against the cabin’s foundation and roof. Remove excess snow from the roof to prevent ice dams and water damage.
Video: Great Tips for Log Home Maintenance
Final Thoughts About DIY Log Home Restoration
Restoring a log cabin is a rewarding project that combines craftsmanship, attention to detail, and a deep appreciation for history and natural beauty. From assessing the condition of your cabin and carefully planning the restoration to repairing logs, sealing and staining, and addressing the roof and foundation, each step is vital to ensuring the longevity and durability of your cabin.
By following a methodical approach to cleaning, repairing, and restoring the logs, as well as protecting the roof and foundation, you’re not only reviving the aesthetic appeal of your cabin but also safeguarding it from future damage. Equally important are the final touches—like restoring windows, doors, and interior finishes—that add comfort and enhance the overall charm of your cabin.
However, your work doesn’t end once the restoration is complete. Regular maintenance and seasonal upkeep are crucial for preserving your log cabin and preventing future issues. With a commitment to annual inspections, cleaning, re-sealing, and making small repairs as needed, your cabin will remain a strong, warm, and inviting retreat for years to come.
Restoring a log cabin requires time, effort, and dedication, but the result is a timeless structure reflecting history and natural materials’ beauty. By taking care of your cabin, you’re ensuring that it continues to be a cherished space for you and future generations to enjoy.